The morning cup of coffee is such an important ritual for most people. You’re half awake and you stumble to the kitchen and fire up the coffee pot. The aroma of the morning brew can be so heavenly. Mmm, can you smell it? There is such an emotional connection to that smell, it is really hard to beat. You pour a cup of that fresh brewed coffee and raise it to your lips, and the magic happens.
So when it comes to making coffee on the road, or more specifically camping, there are certainly many methods available. Percolators. Espresso makers (like the Bialetti), French press. Starbucks or similar packets. Pour-overs, and the good old fashioned cowboy coffee (just add grounds to the water and boil) are to name a few.
Because I love drinking coffee, I have tried many of these versions, and some had greater success than others. The mini espresso maker was fun to use and made an okay cup of espresso, but it wasn’t really great for multiple uses unless you had a pair of leather gloves to open it up, and refill it, and I was always more. The french press I used was a Nalgene version, and I could never get the press installed in the bottle and the clean up was time consuming and required a lot of water for that clean up . At our “cabin” (aka glorified campsite) I use the percolator. Mostly because I am making 6 cups or more, I have plenty of water available, and I have a camp stove to cook on. It makes a damn good cup of coffee, and I usually drink way to much. But it is big, and it does have many parts, so it probably isn’t the best option when motorcycling camping. The “packets” are great for camping. They are light, compact, and you can bring a lot of them for a quick cup. Simply boil water, add coffee, stir and drink. But the Starbucks version tends to be expensive, and I can’t get past the fact that when using multiple packets, you start to create more non-composting or non-recyclable waste. Look around a state park campground and you will usually find lots of remnants of others coffee packets hiding in the grass around the picnic table.
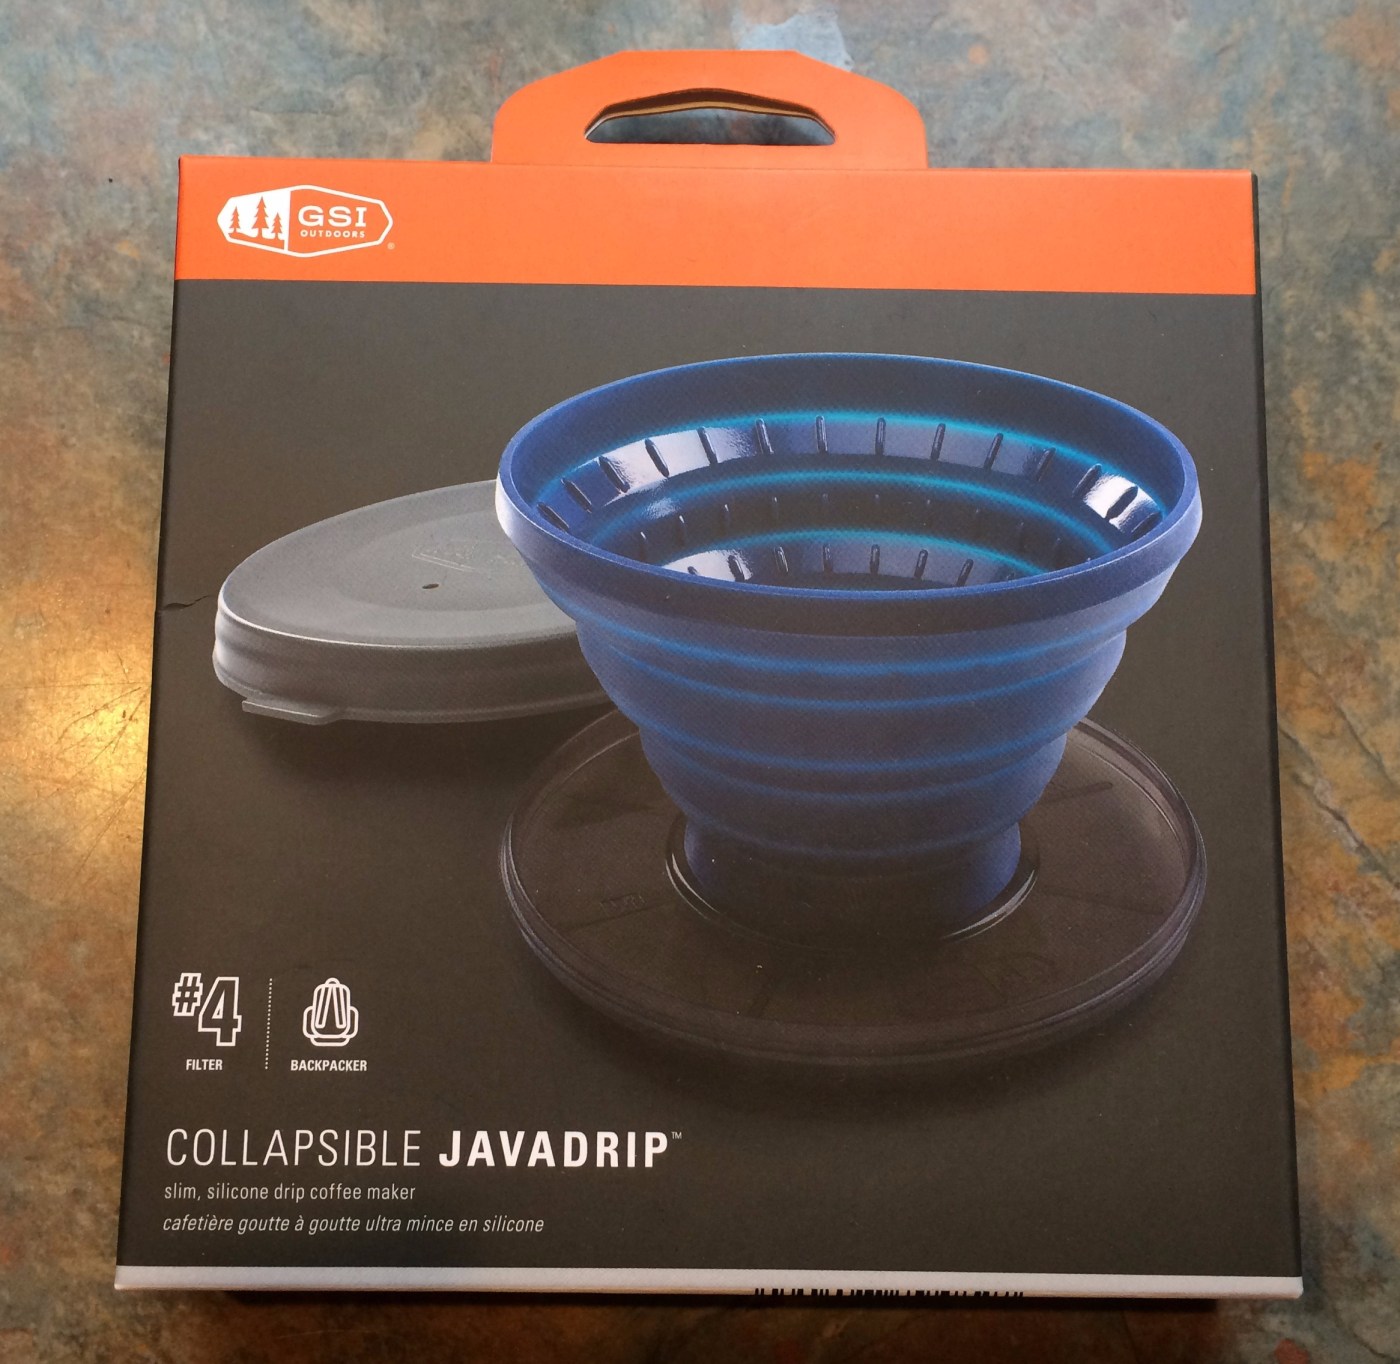
So when a co-worker told me how the pour-over had completely taken over his coffee making, I thought I had better give it a try. He had been using the GSI version which I ultimately purchased and have used many, many times. Before I bought it though, I did some research to find out what was going to work best for my needs. Those needs? 1.) Simple to use 2.) Brews one to 4 cups of coffee 3.) Easy to clean up 4.) Compact and light. There are some interesting options out there. You have to admire the creativity of product designers. For such a simple device things can become complicated pretty quickly. Some are incredible simple like the Orlieb Coffee Filter. And complicated like the GSI Ultralight Java Drip, that uses little legs to prop up your filter above the coffee cup.
On my coworkers recommendation, I picked up this GSI Collapsible Java Drip It is compact and relatively light; brews a decent cup of coffee; makes between one to twelve cups total. Requires minimal cleanup (compost or throw away the number four paper filter with the spent grounds), and is really simple to use.
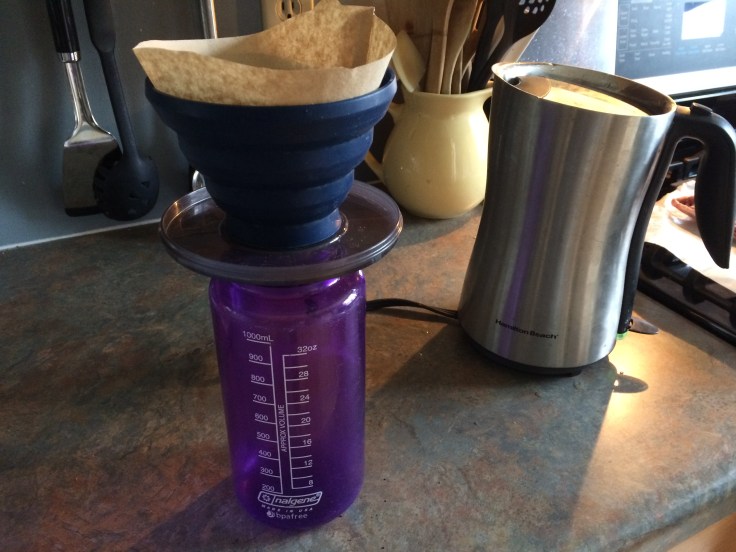
To use the GSI Drip, you do need a #4 cone filter; two containers (one to boil water and one to hold your fresh brewed coffee); camp stove; tablespoon; and your favorite coffee.
To make the coffee: Boil the water and prep the GSI Drip with your favorite ground coffee; (add about one tablespoon of coffee for every 6 ounces of water). When the water is boiling, wet the grounds in the filter. Stir the coffee in the filter with your spoon to ensure all the grounds are wet. After you stir, let the coffee “breath” for about 30 seconds undisturbed. Then, slowly start to add more water in a circular motion to allow the coffee to “bloom”. The “bloom” is hard to explain until you see it. When you add a drop of water, the coffee will blossom and change color. Continue adding water to your coffee filter to get the perfect cup of coffee. Do this slowly to ensure your cup of coffee has fully absorbed all of the goodness that this brewing process allows. About 3 minutes for a cup of coffee is my goal. After, your cup is done, sit back and enjoy!
A couple of details that you might want to adopt. One, rinse your filter with some boiling water before you add your ground coffee. This takes care of any impurities that might be in the filter. Discard the water in your catch container, then add coffee and begin the brew process. Second, I buy ground coffee for convenience. Grinding your coffee before you brew will definitely get you more flavor. Finally, pay attention to the color of your “bloom”. By watching the color of the coffee as you add water, you will quickly determine when your coffee is spent. The color will lose it’s depth and fullness and will start to become lighter. Adding more water at this point will make a weaker cup of coffee.
Now that you have enjoyed your coffee it is time to clean up. Pay attention this is important. To clean up, compost your filter and grounds, rinse the GSI filter and coffee cup with some clean water (soap not needed) and go for a hike or motorcycle ride.
Here is a my set up to brew 32 oz of coffee.


Leave a comment